Post-Processing Your Beyond Space Models
Congratulations, your printer has just finished its job, and you now have your first Beyond Space model! However, the work isn’t quite done yet. Post-processing is a crucial step to clean, cure, and prepare your model for assembly and painting. Whether you have a wash and cure machine or are working without one, this guide will walk you through the entire process.
Post-Processing Your Print
Step 1: Removing the Model from the Build Plate
Once your print is complete, the model will still be attached to the build plate and covered in uncured resin. Here’s how to safely remove it:
Wear Safety Gear:
- Put on nitrile gloves to protect your hands from uncured resin.
- Work in a well-ventilated area, and use a respirator.
Detach the Model:
- Use a scraper tool to gently remove the model from the build plate. Be careful not to damage the model or injure yourself. They should easily pop off.
- Don't worry about the scraper scratching the build plate; scratches don’t harm its performance.
Step 2: Cleaning the Model
After removal, your model will still have liquid resin on its surface, which needs to be cleaned off before curing. Here’s how:
What Is Cleaning and Why Is It Important?
Cleaning removes uncured resin from the model, preventing sticky surfaces and ensuring a smooth finish. It’s an essential step for quality prints and safe handling.
Using a Wash Machine (if you have one)
Set Up the Wash Cycle:
- Fill the wash tank with isopropyl alcohol (IPA) or an approved resin cleaning solution.
- Place the model in the washing basket and ensure it is fully submerged.
Run the Wash Cycle:
- Start the wash cycle (typically 3–6 minutes). The machine will agitate the liquid to clean the model thoroughly.
Inspect the Model:
- After washing, check for any leftover resin. If necessary, run another short cycle.
Manual Cleaning Without a Machine
Submerge in IPA:
- Use a plastic or glass container filled with IPA to submerge the model.
Agitate or Brush:
- Swirl the container gently and use a soft brush to clean the model’s surface and remove resin from detailed areas.
Rinse Thoroughly:
- Transfer the model to a second container with clean IPA for a final rinse.
Step 3: Soaking and Removing Supports
After cleaning, soaking the model in warm water can help loosen supports and make them easier to remove:
Soak in Warm Water:
- Submerge the cleaned, uncured model in a container of warm water (not boiling) for 30–60 seconds.
- This softens the supports, making them easier to detach.
Remove Supports:
- Gently remove supports by hand. Most should fall off easily after soaking.
- Use hobby clippers or flush cutters to carefully remove any stubborn supports.
Step 4: Drying the Model
After cleaning and removing supports, it’s important to dry the model completely before curing. This removes any residual cleaning solution and prevents curing issues.
Air Dry:
- Place the model on a paper towel or drying rack in a well-ventilated area and let it air dry completely. Let it sit for at least 3 hours until fully dry.
Machine Dry:
- If using a cure machine, some models include a drying cycle to expedite this process.
Step 5: Curing the Model
Curing hardens the resin, making the model safe to handle and ready for assembly or painting without the need to wear safety equipment. This step is crucial for achieving durability and stability.
Why Curing Matters
Uncured resin is soft and tacky, making the model fragile and unsafe to handle. Proper curing ensures:
- Durability: Fully hardened models withstand handling and gameplay.
- Stability: Prevents warping or soft spots over time.
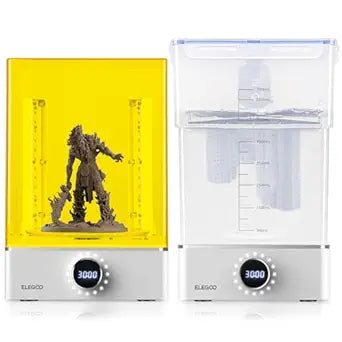
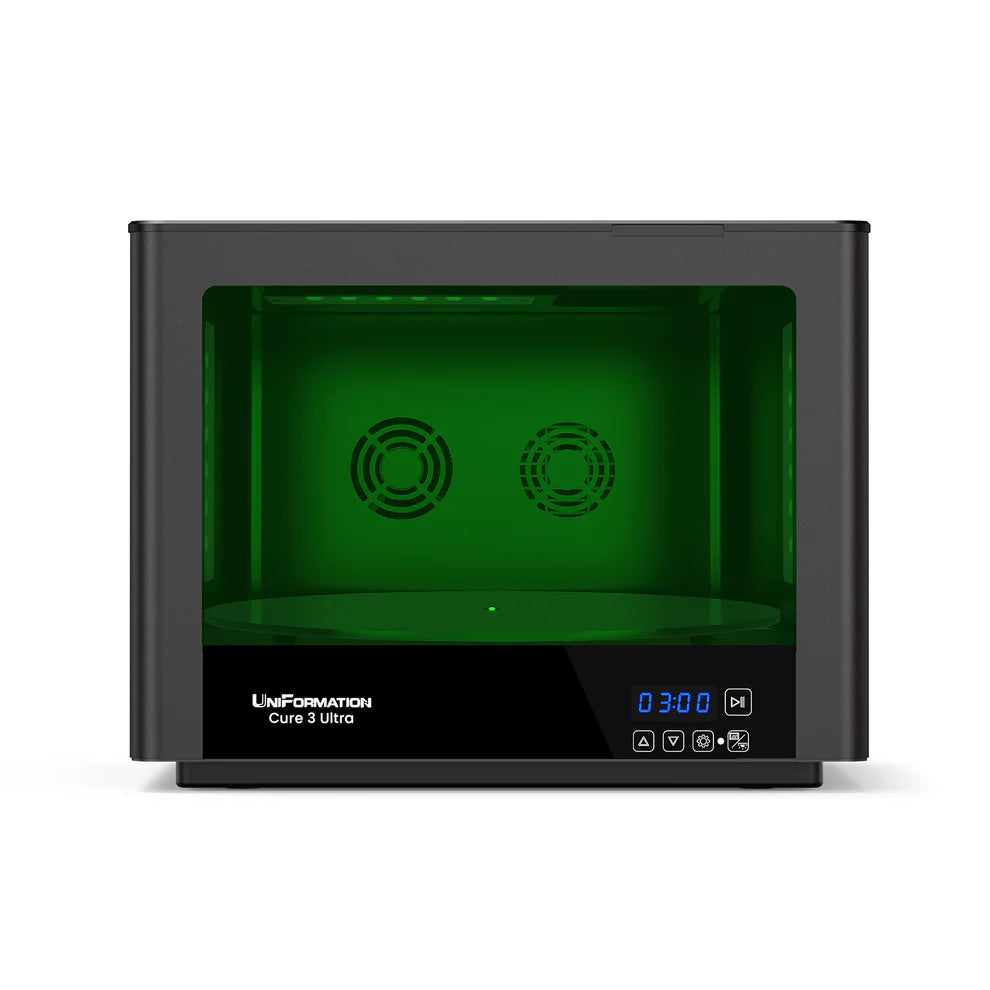
Using a Cure Machine
Set Up the Cure Chamber:
- Place the cleaned, dried model on the platform of the machine.
Run the Curing Cycle:
- Start the cycle (typically 2–5 minutes). Ensure the model is evenly exposed to UV light. Guardsmen and Knights, for example, take 2–3 minutes. Larger units such as Lancers and Ironclads take 4–5 minutes. Avoid curing above 5 minutes.
Rotate as Needed:
- For larger or detailed models, rotate halfway through for even curing.
Manual Curing Without a Machine
Use a UV Light or Sunlight:
- Place the model under a UV curing light or in direct sunlight.
Rotate for Even Curing:
- Turn the model every few minutes to ensure all sides are exposed.
Monitor the Time:
- Curing can take 10–20 minutes with a UV light, depending on its intensity.
Step 6: Inspect and Finalize
Once cured, inspect your model to ensure it’s ready for assembly and painting:
- Check the Surface: Make sure there are no sticky or soft areas, which indicate incomplete curing.
Recommended Supplies for Post-Processing
These tools and materials are essential for cleaning, curing, and preparing your Beyond Space models. There are many different types of wash and cure machines available, and it’s recommended to pick one that pairs with your 3D printer. Most companies design specific wash and cure machines to complement their printers, ensuring compatibility and ease of use. Having the right supplies will make post-processing smoother and ensure professional-quality results.

ELEGOO Bundle with Separate Wash Station and Cure Station
Example wash and cure machines. Recommended to get the ones that pair with your 3d printer, Many do work with other brands but make sure the volume matches your print size.

Uniformation Cure3 ultra
We personally use this cure machine, it works very well and has plenty of space.

Nitrile Exam Gloves
Don't cheap out on gloves, get well fitting quality gloves. We use these.
Need Help?
If you have any questions about this guide or run into problems with 3D printing, join the Beyond Space Discord! Our community, including myself, is always happy to help you troubleshoot and succeed.